
Installation Guide
How to install your eSIM
Pick your phone below for an exact, screen-by-screen walkthrough — about two minutes, no app to download.
Step 1 of 7
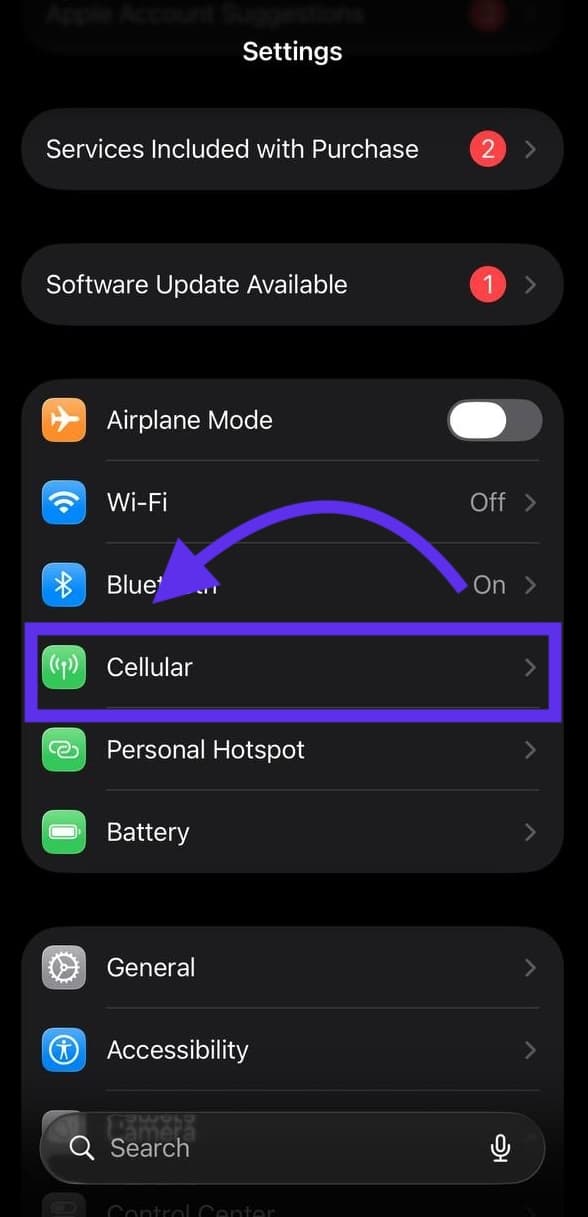
Open Settings and tap Cellular
On your iPhone, open the Settings app and tap Cellular.
Step 1 of 7
Step 1 of 7
Open Settings and tap Cellular
On your iPhone, open the Settings app and tap Cellular.
Step 2 of 7
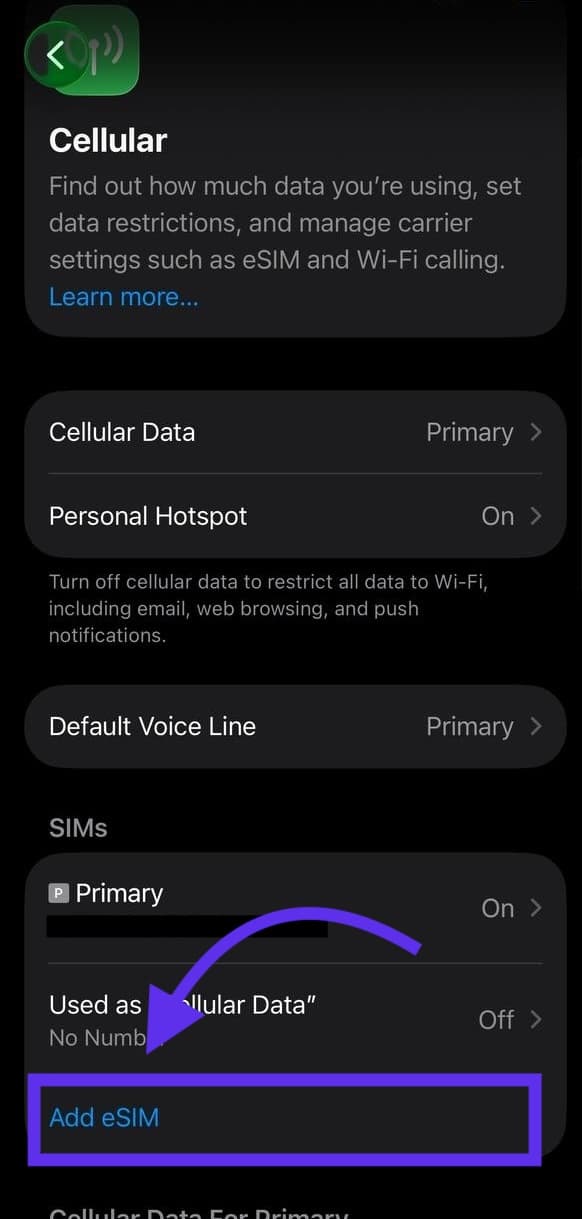
Tap Add eSIM
Scroll down to the SIMs section on the Cellular screen and tap Add eSIM.
Step 3 of 7
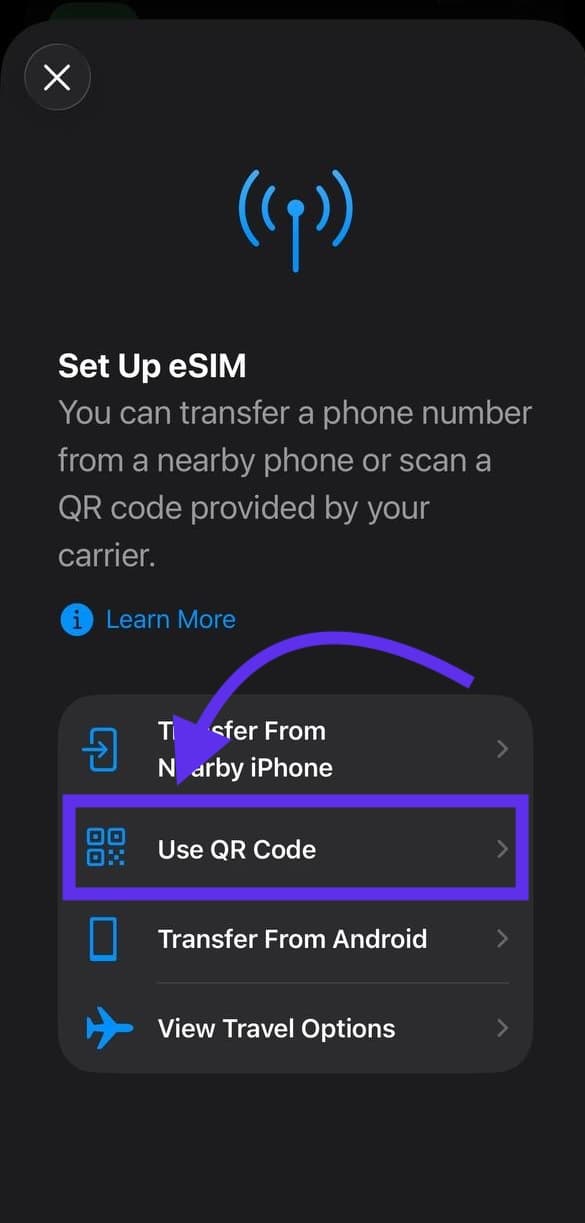
Choose Use QR Code
iOS asks how you'd like to set up your eSIM — tap Use QR Code.
Step 4 of 7
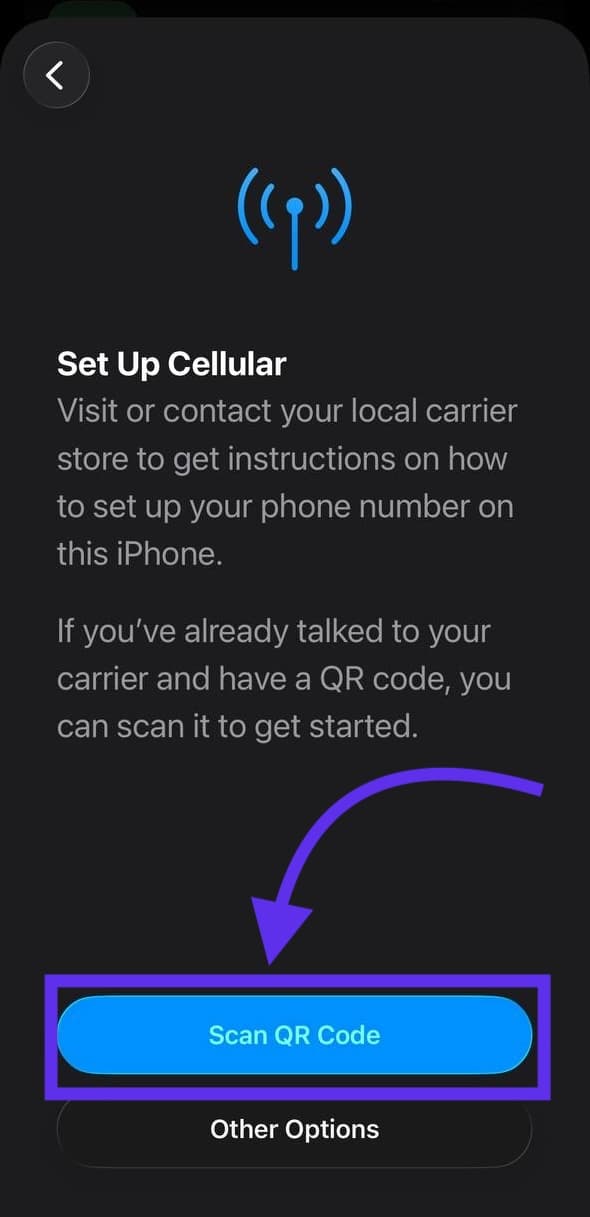
Tap Scan QR Code
On the next screen, tap Scan QR Code to open your camera.
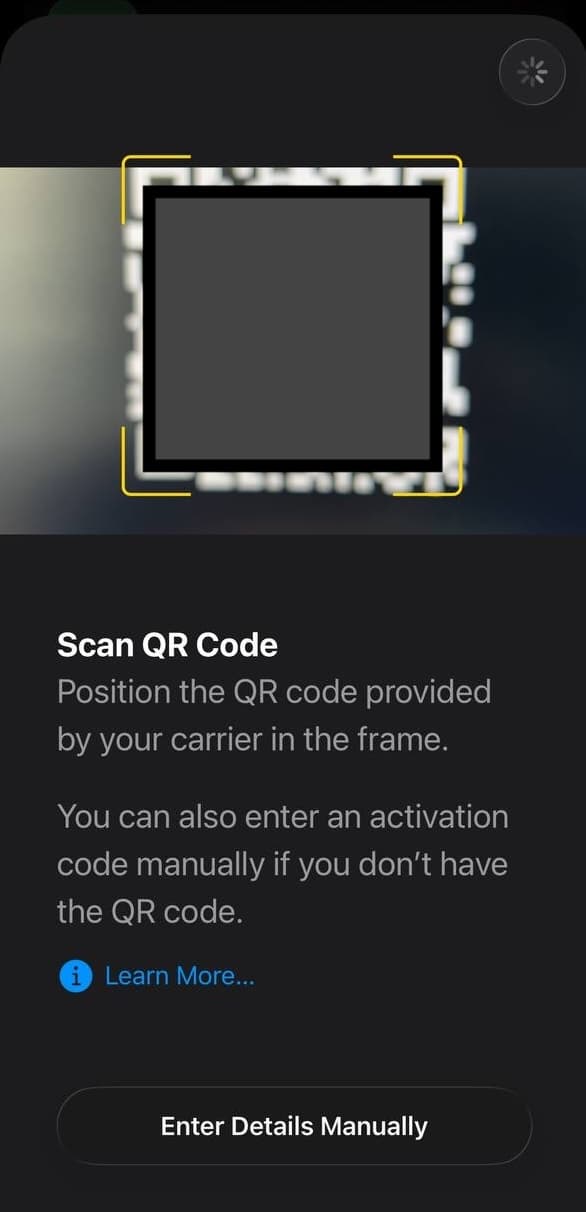
Step 5 of 7
Scan the QR code from your order
Point your camera at the QR code from your confirmation email or order page. No code handy? Tap Enter Details Manually instead.
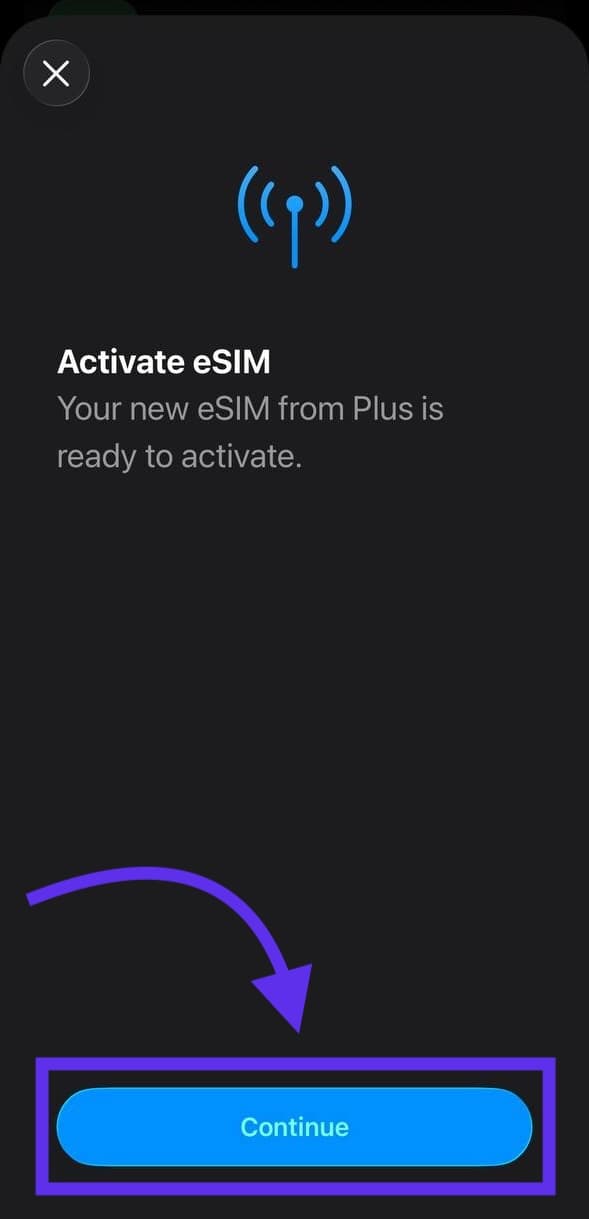
Step 6 of 7
Tap Continue to activate
Your iPhone recognizes the eSIM — tap Continue to finish activating it.
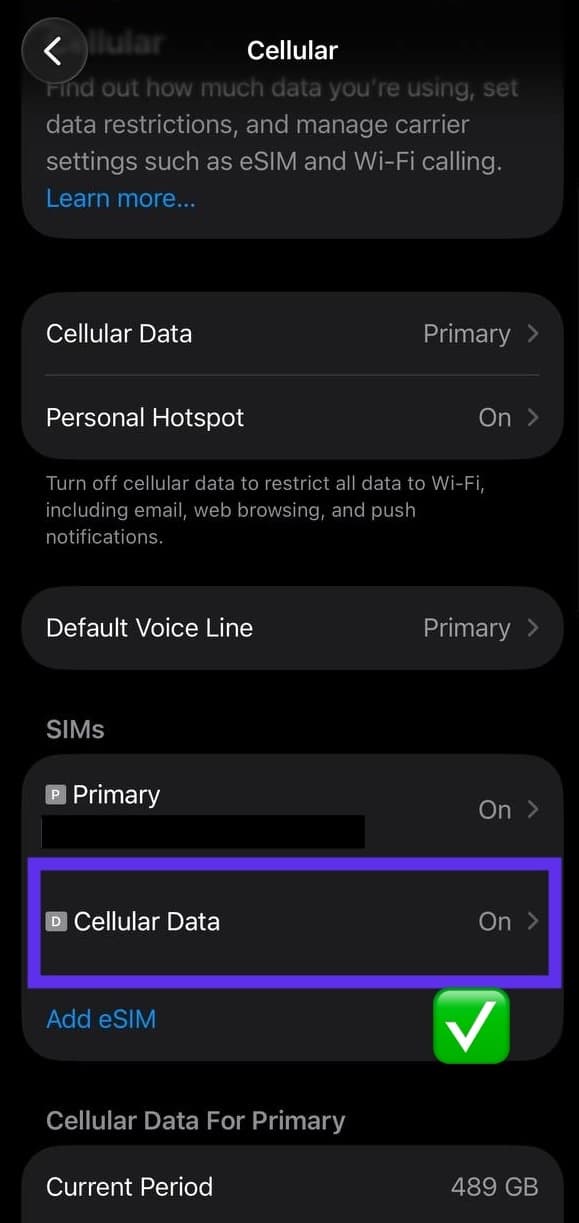
Step 7 of 7
You're all set
Your new eSIM line now appears under SIMs and is ready to use. Turn on Data Roaming for it before you rely on it abroad.
One tip before you go
Install the eSIM whenever you like, but activate it only once you land — validity days start counting from activation, not installation.